Casualty Movement and Evacuation: Methods and Stretcher Types
Share
Transporting a casualty out of a danger zone or carrying them to an ambulance is one of the most physically demanding and risky aspects of first aid. Choosing the wrong movement technique can worsen the victim's condition, disrupt controlled bleeding, or cause additional spinal injuries. For this reason, it is crucial to know how to apply proper evacuation methods and select appropriate equipment.
Safe Evacuation Principles and Preparation
Before attempting to move a casualty, you must first assess the safety of the environment. If there is an immediate threat at the scene (fire, collapse, incoming fire), the victim must be rapidly dragged to a safe zone using emergency extraction techniques. If no immediate danger is present, movement is carried out only after life-threatening conditions have been addressed and emergency services have been called via 112 (Lithuania's emergency number).
Prior to transportation, lifesaving interventions defined by the MARCH algorithm are performed. First, massive hemorrhage is controlled, airways are stabilized, and open chest wounds are sealed. Additionally, fracture immobilization is performed so that bone fragments do not damage blood vessels during transport. All performed actions and the patient's status should be documented on a casualty card for medical turnover.
Casualty Movement Techniques Without Equipment
When commercial stretchers are not available, a casualty is transported using manual carry or drag techniques. The choice of method depends on the number of rescuers, the weight of the victim, and their level of consciousness.
Key movement techniques:
- Clothes or Shoulder Drag: Used when a single rescuer needs to urgently pull the casualty a few meters out of a high-danger zone. The rescuer grips the collar of the victim's jacket or vest and pulls backward, striving to keep the head and neck in alignment.
- Supportive Carry (One-Rescuer Assist): Suitable for a conscious casualty who can partially bear weight on one leg. The rescuer stands on the injured side, places the victim's arm around their neck, and holds them by the wrist and waist.
- Firefighter's Carry: Lifting the victim onto a single rescuer's shoulders. This method allows transporting an unconscious person over longer distances, but it requires significant physical strength and is unsuitable if a spinal or pelvic fracture is suspected.
- Two-Rescuer Carry ("Two-Handed / Four-Handed Seat"): Two rescuers join hands to form a seat for a conscious victim, or support their legs and shoulders when the person is unconscious.
Stretcher Types and Selection
Using stretchers makes the evacuation process significantly safer for the casualty and easier for the rescuers. Equipment selection depends on the evacuation route and available resources.
For field conditions and tactical operations, tactical Lithuanian stretchers ("Alfa Charlie" mod. 3) are ideal. These are rollable rigid stretchers stored in a cylindrical pouch with MOLLE webbing, allowing them to be attached to a backpack. Once unrolled, the casualty is laid down and secured with straps—allowing them to be carried or dragged over snow or through narrow passages. We demonstrate how to roll out these stretchers in our video review.
Another widespread category is soft stretchers with a pouch. These are lightweight stretchers made of synthetic fabric with 6 or 10 handles. Soft stretchers lack a rigid frame, so when folded, they occupy minimal space in a pack. They are designed for rapid short-distance transport, but they do not prevent spinal bending and are therefore unsuitable when spinal cord injury is suspected.
Evacuation Straps and Auxiliary Gear
Alongside standard stretchers, auxiliary tools are used to facilitate dragging or lifting casualties under tough conditions. For instance, extraction straps allow rescuers to drag a casualty faster while reducing arm fatigue.
A sturdy Cobra® belt or tactical vest can also serve as a reliable grab point when pulling a casualty. When transporting victims in vehicles or specialized transport, a mobile medical organizer 1+2+3+4 is used to keep supplies accessible and arranged by category.
Comparison of Evacuation Methods and Equipment
| Equipment / Method | Number of Rescuers | Spine Protection | Advantages | Disadvantages / Limitations |
|---|---|---|---|---|
| Collar / Strap Drag | 1 rescuer | Poor | Rapid application in danger zones | High physical effort, suitable only for short distances |
| Soft Stretchers | 2–6 rescuers | None (bends) | Compact, lightweight, multiple handles | Unsuitable for suspected spinal or pelvic trauma |
| Tactical Rollable Stretchers | 2–4 rescuers | Moderate / Good | Durable, designed for both dragging and carrying | Requires space in pack or on gear |
| Improvised Stretchers (Jackets / Poles) | 2–4 rescuers | Depends on construction | Available in almost any environment | Takes extra time to construct |
Practical Checklist: Casualty Evacuation Workflow
When preparing to evacuate a casualty, stick to these core guidelines:
- Assess the Threat: In a danger zone, perform only minimal dragging. Complete evacuation begins only once in a safe environment.
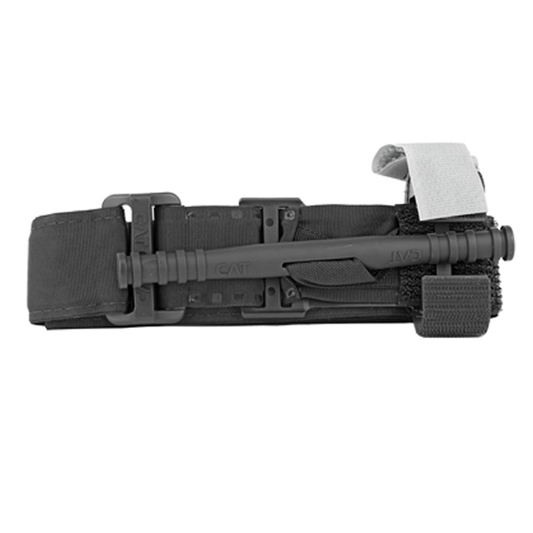
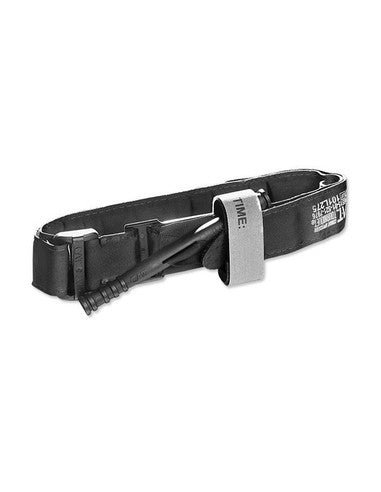
- Stop the Bleeding: Before moving, ensure tourniquets and pressure dressings are securely fastened and will not slip during transport.
- Distribute the Weight: When using soft stretchers, position rescuers evenly on both sides. The torso is the heaviest part of the body, so the strongest carriers should be placed there.
- Secure the Casualty: If the stretcher features straps, be sure to fasten them around the chest and thighs to prevent the casualty from falling out on uneven terrain.
- Protect from Cold Ground: Keep in mind that casualties lose body heat rapidly during transport. For more details, see our guide on hypothermia prevention.
Want to learn these skills hands-on? We organize tactical medicine training—contact us at mokymai@parakomanai.lt for details.
Can't find the item you need? Drop us a line at parduotuve@parakomanai.lt—we're here to help.
References
- Deployed Medicine (TCCC Guidelines): deployedmedicine.com
- European Resuscitation Council (ERC): erc.edu
- Lithuanian Red Cross: redcross.lt
- Lithuanian Emergency Response Centre: 112.lt